Check Point features an unattended installation mode for fresh installation, which may come in handy if you need to upgrade/install an appliance remotely with an non-technical person onsite.
A few limitations to be aware of
– Fresh installs only.
– Preconfiguration for basic networking can only be done on appliances when installing R77.20 or higher
Contents
Create the installation media
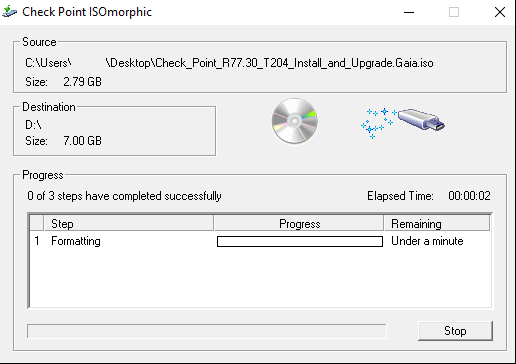
Using the ISOmorphic tool, the ISO of your choosing you choose “unattended installation”.

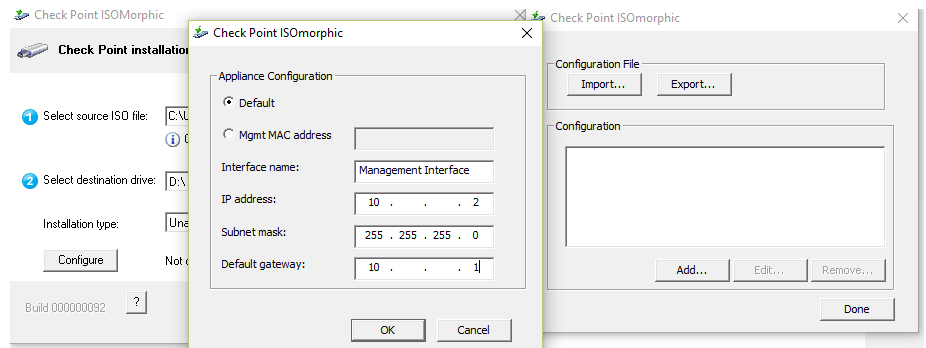
Configure the management interface
Click on configure and insert IP address, netmask and default gateway for the management interface you will access remotely after the unattended installation has completed.
If you know the MAC address of your appliance you can also enter the relevant MAC address and specify the IP address for that interface.
Finalize the USB flash drive
After entering the management interface IP address, you click Go, type “yes” and ISOmorphic copies over the ISO and basic network settings to the flash drive.
The installation
When the onsite technician is about to install the firewall, the procedure would be something along the lines of
1) Plug the correct ethernet cables in place
2) Insert the flash drive into the USB port
3) Boot the appliance
4) Have a cup of coffee
5) Remove the USB flash drive and reboot the appliance
6) Connect remotely to complete the First Time Wizard
Booting
When the appliance boots with an USB flash inserted, the default boot would be “serial” as shown by the picture below. Unless someone changes this value through the console port, the appliance will boot after 90 seconds and install the Check Point software.

How to know when the appliance can be rebooted
If you are connected through the console port, the system will prompt you to reboot the appliance. However, if the onsite technician does not access the console port, he can tell by two indicators
– The interface LEDs are blinking in a round-robin fashion
– The LCD display will show a “completed”-message as shown below

Time wise, the 4200-appliance I tested with took 24 minutes and 40 seconds from power-on till finished installation.
Reboot and connect
Since all the file systems are unmounted prior to the completed message being displayed, you can safely just flick the power-switch off and back on again.
Once booted you can connect via SSH or HTTPS to continue the configuration through the FTW.
From the pictures below, we can see that I successfully manage to connect and verify the IP address and route

